|
|
Post by Guitar on Oct 26, 2015 6:53:02 GMT -6
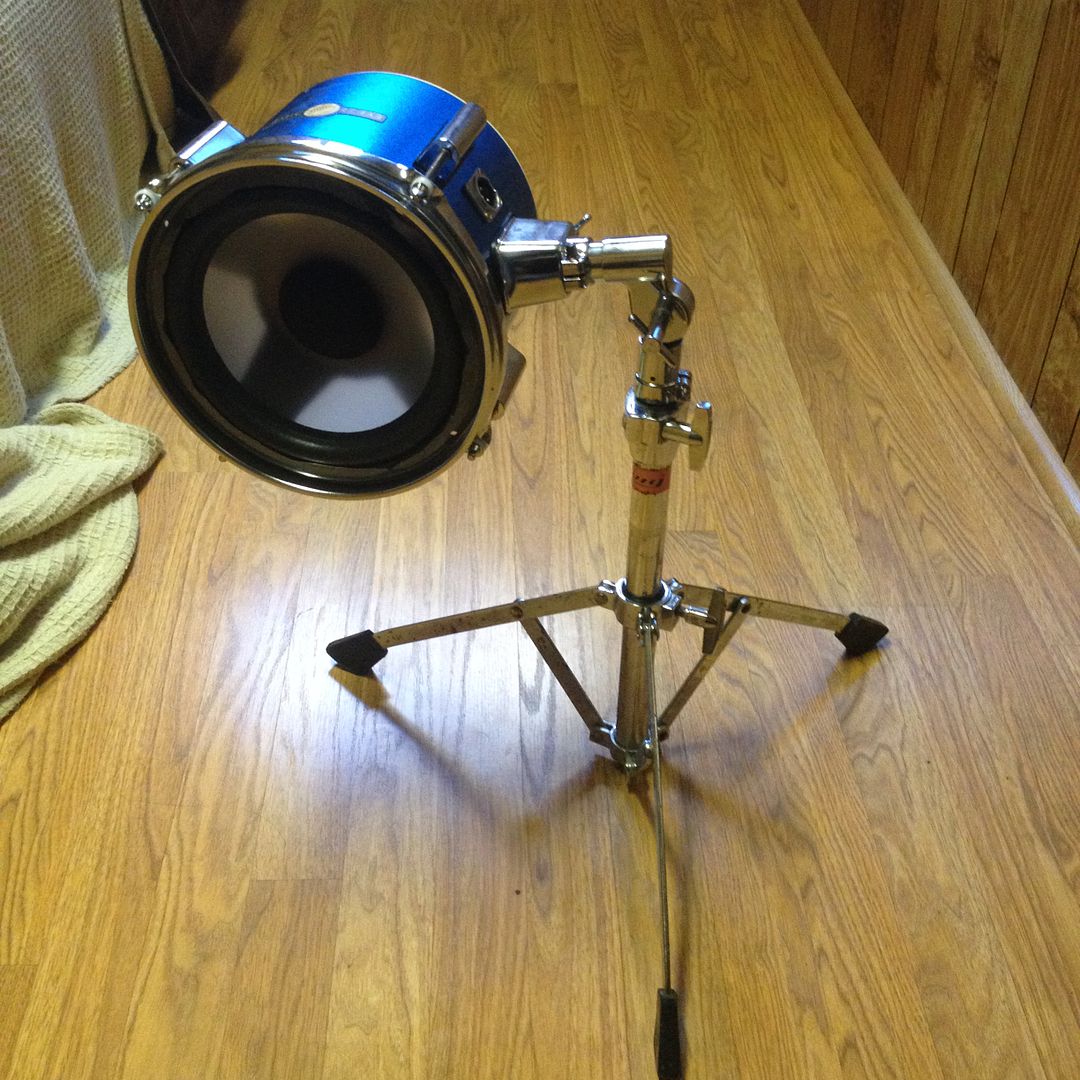
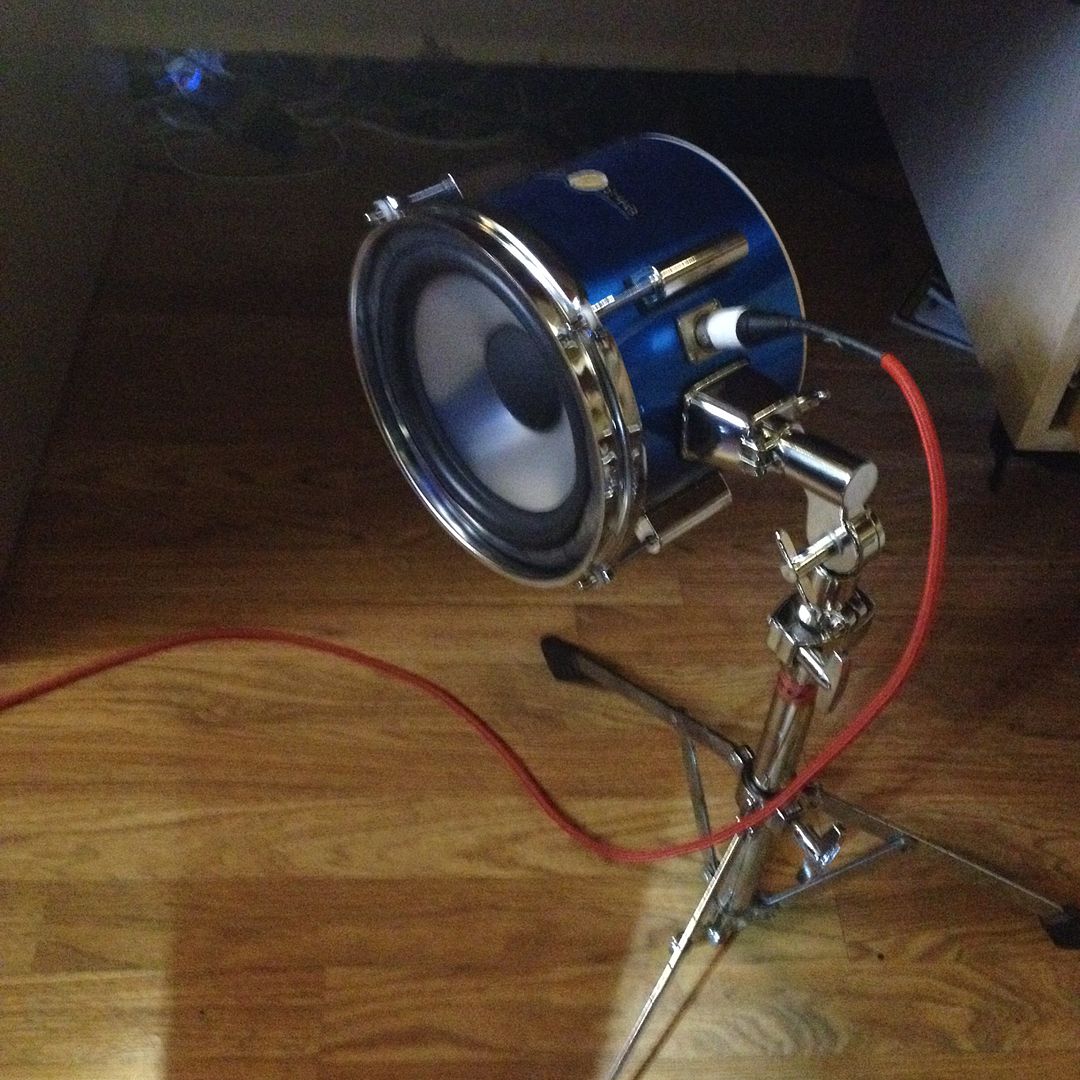
Looks great Svart! Check out the new subkick I just finished, my second DIY subkick.   |
|
|
|
Post by kcatthedog on Oct 26, 2015 7:14:50 GMT -6
nice: is the speaker just a large passive resister ?
|
|
|
|
Post by svart on Oct 26, 2015 7:37:27 GMT -6
nice look and I love the mix purpose; part cuisine part shop with the tools so handy; are these cabinets front rectangular ported then , like how they are adjustable on hinges:you think of everything:) Ikea.. |
|
|
|
Post by Guitar on Oct 26, 2015 7:37:31 GMT -6
nice: is the speaker just a large passive resister ? It's an oversized, too heavy, and under-damped dynamic moving-coil microphone diaphragm. If you want to see more specific details look at my blog post about it in my signature under this post. |
|
|
|
Post by maq3396 on Dec 31, 2015 21:14:52 GMT -6
Spent the last four to five days putting together a pair of G9-51X tube preamps.
Had a horid time with the hi-v components and in the process of powering them up blew 7 or 8 fuses in the power supply, created a small smoke stream and a moderate amount of ozone!
After some fiddling got one to work....just the odd crackle which hopefullly will disappear with tube burn-in.
Have some nice tubes from Christian Whitmore but haven't tried them as of yet.
Next weekend will rebuild the hi-v section of the second unit!
Cheers
Mac
|
|
Deleted
Deleted Member
Posts: 0
|
Post by Deleted on Jan 12, 2016 4:04:57 GMT -6
This weekend i came back to something, that i never had time to dive into, a kind of DIY of the other kind, digital DIY.
I decided that it's time to get much more knowledge of audio dsp. So i looked around and came to Christian Budde's DAV framework, that provides a lot of components for building plugins. It is quite a bit dated, buti always wanted to make a more complete Lazarus port happen, there is not much alternatives for object pascal, and Delphi is too expensive to buy for noncommercial use like mine. And i am not too comfortable coding in C++, while i code in pascal like since i was 14, on Apple II.
So i had the goal to make a functioning denoiser plugin from this, since the one from Chrisian Budde's webpage crashes Sonar and Mixbus for me ... there is something odd in the GUI that my DAWs simply don't like. It loads incomplete there...
I managed to debug and adapt the core components of the framework from Delphi to Lazarus and decided to head for a Synthedit module first, so i can do the non-essential GUI stuff more rapidly and comfortably.
To my surprise and despite i haven't coded anything non-trivial at all in the last years in pascal, i managed to really make everything compile without errors, which was quite a bit of work due to an incomplete preprocessor directive system for freepascal.
And there like thousands and thousands lines of code, and i think noone did a successful build and port for the free freepascal/Lazarus.
Too good to be true, the component works, i expanded it a bit by exposing additional parameters for configurability and usability, and still it transported audio and does at least "something" (gate). In the end it will be a spectral gate that works with capturing a noise profile from audio to use in the gate.
While there still is a bit of work to do, and normally the last 20% afford 80% of the time, i am already quite proud. I now have a set of free tools and a testbed for creating 32bit VST2 plugins with lots of room for experimentation on lower level than possible with Synthedit alone, and for prototyping for later ports to other plugin formats possibly.
OK, quite a bit virtual and abstract DIY, but nevertheless, for me it's fun and finally i came to some digital essentials down to the bones, which will be very interesting for me in future.
Greetings from the digital soldering iron...
|
|
Deleted
Deleted Member
Posts: 0
|
Post by Deleted on May 13, 2016 4:22:07 GMT -6
Upcoming weekend:
Testing and servicing an EMT266 Limiter. A bit anxious how it looks inside. Has been stored under suboptimal conditions (too warm, too humid) and not been in use for long time...
Quite complex analog lookahead limiter/compressor, that is much higher quality than the net normally thinks (e.g. on purple sites...). If i remember it right, Haufe und Pikatron transformers, lavish psu in a separate chamber, Eurocard subrack which unfortunately is a bit prone to contact issues on the backplane. Huge amount of socketed LF356 opamps - also prone to contact issues after years/decades. Need to research which type they used in the later "X" variant with better specs by opamp upgrade (if anyone of you knows, which one it is, please reply here...)
Lots of sources for typical technical issues. But sounds awesome if you know how to use the "compression" mode. Fast broadcast brickwall/"concrete" limiter/compressor. Very little compression artifacts/color, nice subtle sonic fingerprint, most probably due to the quality transformers. Lets an SSL buscompressor look like a cheap noisy distortion machine.
Researching external circuitry requirements for NTP limiters (4 cards), i.e. psu, binary coded release circuit switches, stereo board (wtf - nothing online at all except the 179-400 schematic still. I was in hope that some some manual or service manual docs might have shown up the last years. Last time i spoke to ex-NTP people at DAG2000, they literally had - nothing.)
These limiters sound awesome. ZFT module in and Lundahls on the outputs VCA limiter. Earlier models with a discrete VCA daughterboard, later ones with DBX2151 chip. AFAIK the NTP 179-310B limiter cards have same pin layout to the 179-400, at least i hope so, there is no docs at all about these. I am wondering if they can be used also on bass, guitar or vocals - only heard them in the 2-bus, where they are a secret weapon, very classy - awesome...
|
|
|
|
Post by Guitar on Jun 8, 2016 17:23:03 GMT -6
I just installed some Warehouse Guitar Speakers Reaper 30 watters into a 2x12 cabinet (LAB amps MDF cabinet) that I am using with my mid-'60s Selmer Treble n' Bass MK II amplifier.
After a good two days of break in, they are sounding very punchy and mean, just sweet enough without being too rude. Combined with overdrive pedals, and a vintage Guild Starfire II with Gibson pickups, it is a match made in heaven. All I really could use now is a Weber MASS attenuator to get the cranked amp sound at lower volumes, as this thing is pretty loud and clean through a comfortable range, and the WGS speakers are very efficient.
|
|
Deleted
Deleted Member
Posts: 0
|
Post by Deleted on Dec 12, 2016 13:12:01 GMT -6
This weekend i walked by my Ibanez RB-888 "black bean" Roadstar 2 bass and intuitively decided to convert it to fretless - ghetto style.
My goal was to do the conversion as immediatly, fast and cheap as possible - and without buying anything.
I removed the frets with 1-Euro pedicure scissors. I saw these a few days ago in a danish "1-Euro shop", it was perfectly made to get below the frets and rip them out. No heat applied to them. Time - 5 minutes.
I decided to get a cyanacrylate finish and use some type of artificial wood filling instead of going thru the time consuming cutting and sanding of veneer that i do not have at hand. So i.e. wood/cellulose/anything like this powder glued into the fret cuts with the same cyanacrylate glue ("superglue", "second glue" in german, because it literally cures in seconds). The cyanacrylate glue also comes from an 1-Euro shop and costs, well, 1 Euro. It is very fluid, which is perfect for this kind of tasks. It seems to work as good as the very fluid expensive stuff that you can get in the hobby modelmaker shops that many recommended for this - but for a fraction of cost.
I did not care to do any special thing to the sides of the fret slots, these easily come up a bit here and there when you remove frets. This is totally normal. Everything is sanded later *after* applying the cyanacrylate. The main idea is having a very nice and cheap fretboard finish *fast*, this will not be visible as soon as the first layers of cyanoacrylic "laquer"/glue are applied.
After a few layers, which i applied very fast because they need minimal time to first go into the wood and then build up thin layers like glass clear laquer, i used a sanding sponge, the rougher side. For application of the cyanacrylate i use a piece of paper or cardboard, both works well because it works good to get the glue everywhere on the fretboard most equally thick. I rub the powder into the fret slots again and apply the next layer/s immediately.
If you spill some of this glue, use water on it immediately. This hardens the glue so fast, that it most probably breaks from the resulting tension of the fast polymerisation.
So far, it looks great and i invested less than half an hour all in all (made two long breaks to do other things, but this is *maybe' helping the thing a bit).
I ran out of cyanacrylate and did not get more yet, but perhaps it is already enough to finally sand and polish.
The sanding sponge is a great tool for this, so i manage to sand the fretboard without really changing the radius in a noticable way, and i did not even use a radius block for sanding.
Cyanacrykate glue cures very, very fast. If it is very fluid, it is a matter of seconds to few minutes. Much faster than polyurethan that many use for this task.
Maybe i get ready with it this evening if it turns out i get ig to a good state without a further cyanacrylate layer. Depends, how well todays sanding result turns out.
After the two sides of the sanding sponge i will already use 1000 sanding paper, wet.
Thereafter a polish is applied. If you have it there, use some car polish, they often are very good on guitar laquer. And the ghetto stuff for a fast polish without polish is, tataaaa, toothpaste. Especially the stuff for extra shiny teeth. Great tiny polishing particles most of the time....
I did not have a good time the last weeks, also due to cluster headache, which also triggered me into melancholia (which is kind of a thing because i am bipolar type 1). This project i started to get fast results and high reward factor and cheer me up a bit. Works pretty good i guess....
|
|
|
|
Post by ChaseUTB on Dec 15, 2016 7:08:40 GMT -6
I cut, wired, crimped, soldered my 0 ga OFC and installed the big 3 upgrade which is upgrading the alternator to battery positive, battery negative terminal to chassis ground wire, and engine ground wire to chassis. With the help of my stepdad, I was able to have the right tools or I would have been f*****. Seeing as tho I rely on a cane, It was a lot for me to do and it was the first time I had ever really done any electrical car work or any car work. I learned a lot and feel accomplished. I had a damn difficult time dropping stupid bolts in the dam engine at the worst times 😂
|
|